A No-Hassle Technique to Pickle Wood
Step into any furniture store and chances are you will see a pickled finish on at least one item. You might spot it on a bed, dresser, table, desk, and even cabinet. A pickled finish is one of the methods furniture makers use to “antique” their projects, and it is quite a popular technique.
In the simplest terms, pickling is a finishing technique that whitens wood. Although you can find pickling stains sold in most hardware stores, technically pickling is a method and not a finish. I’ll explain more about the method below.
Many sources claim that oak and ash are the most common woods pickled; some even claim these are the only two woods you can pickle – not true! You could pickle any wood, however you would probably have better results staying with lighter colored woods. For my project, I used pine.
You can buy a pickling stain or you can make your own. Let’s talk about how to make your own.
Here’s What You’ll Need
- Sandpaper (150 – 220 grit)
-
1 quart of white paint (less if your project is considerably smaller than my pantry)
-
1 quart of water
-
Mixing can (I just used the paint can)
-
Paint brush(es)
-
A cloth (soft and clean is best)
-
Varnish / polyurethane
-
Dark dye or stain (optional)
You can use oil or latex paint. The material list above is geared toward latex (i.e., water-based) since that is the type of paint I had leftover from a previous project. If you choose oil, you’ll need about a cup of paint thinner instead of water. Everything else is the same.
There is some debate as to whether you should use primer or regular paint. Some claim primer works best because primers have better coverage and come in dull, flat finishes that won’t add any shine to the wood surface. I tried both regular paint and primer and noticed no apparent difference. If you only have regular paint, and you are concerned about the shine, just use a flat paint instead of glossy.
Here’s How to Create an Amazing Pickled Finish, Step by Step
1) Prep the wood.
The general rule when finishing wood is that if you can see a blemish before you apply the finish, the blemish will be magnified by the finish. Make sure you take the time to sand your project well. Smooth out any sharp edges or corners. For the pantry, the plywood needed extra sanding because of unsightly pits in the wood.
Once the project has been sanded, clean off as much sawdust as you can.
Optional Step: Wet the wood.
Depending on the species of wood you use, and its grain patterns, you may want to wipe down the entire project with a wet sponge. Allow the wood to dry, then sand with about 150 grit sandpaper. The water raises the wood fibers before you apply the stain, which can still be sanded smooth without removing any stain. Otherwise, the liquid in the stain could raise the grain.
I tested the wood on my project beforehand and found that wetting the entire pantry wasn’t necessary. The plywood and pine boards simply did not have any noticeable grain raise.
2) Make the Stain
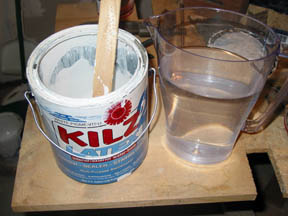
Mix water with latex-based paint to create the stain.
This next step is not science. I had about a quart of paint leftover in a gallon can. I started by adding 1 cup of water and then ended up pouring in about 2 cups of water total.
Mix the water with the paint. The amount of water you add isn’t too important because you will be wiping away most of the paint anyway. Just make sure it is thinner than the original paint but not as runny as straight water.
One thing that is important is to mix enough stain to provide coverage for the entire project. Otherwise, if you have to remix the stain, you might have one solution brighter than the other, and that wouldn’t look good. Or, if you want to make pickling a science, just remember the exact portions of paint and water you mixed. Then repeat the portions.
3) Wipe On the Stain.
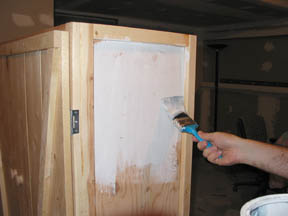
Apply a generous coat of stain.
Use a brush since it’s easier to reach into corners than just using a rag. Apply a thick coat of the stain on a manageable area – not so much that it completely dries before you can wipe it down with a rag.
At this stage, it’s not important to worry much about wiping the stain in the direction of the grain, unless of course you allow the stain to dry before wiping it down. More on that later.
4) Wipe Off Excess Stain.
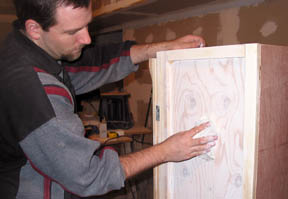
Use a rag to wipe off excess stain.
Before the stain dries completely, use a damp rag to wipe away the stain. Depending on how hard you press, you can wipe off almost all of the stain or leave most on. It’s mostly preference. Just make sure you keep the surfaces of the wood the same consistency of whiteness.
At this point, I like to wipe the stain in the direction of the wood grain. However, don’t stress too much over this because the rag smooths out most noticeable strokes.
Tip: It’s a good idea to use some leftover scrap wood to test the finish. This will give you a good idea as to how well the wood accepts the stain. I found that the pine boards did not absorb as much as the plywood, which helped me gauge the amount needed for each surface type.
5) Repeat Steps 3 and 4
Adding another coat will result in a whiter, less transparent look. For the pantry, I applied 3 coats of stain because it matched the dinning room better than having only 1-2 coats. Also, by applying 3 coats I was able to match the plywood with the pine boards perfectly.
6) Apply Varnish
Varnish is important because your pickling finish is basically a wash, which can be, well, washed off. Not easily, but it can happen, especially if you might use any cleaners or other chemical products on your project. To protect against the finish washing off, apply a coat of non-yellowing varnish.
If you decide to follow Step 7, it’s a good idea to apply a coat of varnish to the project now. It will help prevent against any possible muddying up that may occur between the pickling stain and the accent stain. Some people suggest using a spray-on varnish, which I used but did not find necessary because the pickling had completely dried and does not wash off very easily.
If you don’t follow Step 7, just wipe on a coat of varnish. I used my favorite varnish, Kel-Thane. It is very important to work the varnish in the direction of the wood grains. I also purposefully used a brush to give a subtle texture of grain to the wood.
7) Optional Step: Apply a Dark Stain

Gel stain
If you want to add more of an antique feel to your project, like I did with mine, follow this step. I purchased a gel stain from my local craft store (a dark walnut color). You pick whatever color matches your project best.
I mixed the gel with water so that it would be easy to apply. For this accent stain, the runnier it is the better because you need to be able to wipe off as much as possible. Use a clean rag to wipe off almost all the accent immediately after you wipe it on; it dries quickly. Note: A little goes a long way, so start sparingly. I made sure to follow the grain direction with this accent stain. It is crucial to follow grain direction on this step.
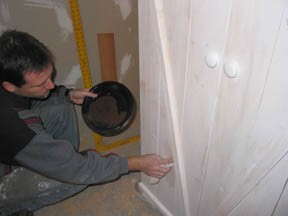
Wipe on the accent stain. Notice the small amount of stain on the plate.
Tip: Test out the accent stain in an inconspicuous location first – either on scrap lumber or somewhere unseen. I tested it on the underside of one of the shelves before proceeding to apply it on the whole pantry.
Apply one more coat of varnish once this accent stain has dried.
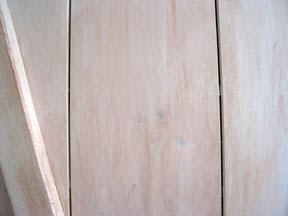
Close up of accent stain.
You are now finished with your finish.
May 17, 2012
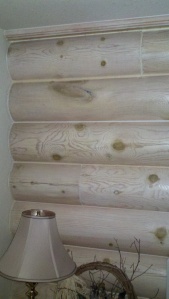
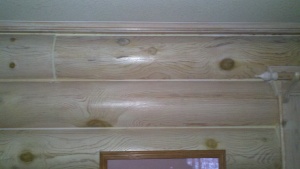
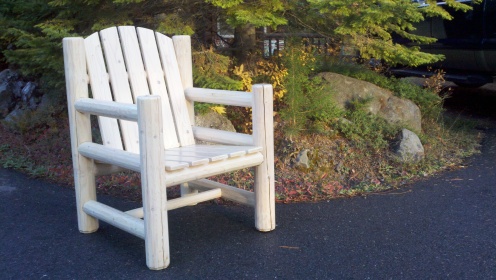
We stayed in a cabin last winter that had the logs and furniture pickled. Very cool. I took some pictures with my phone. Not the best quality but you get the idea.


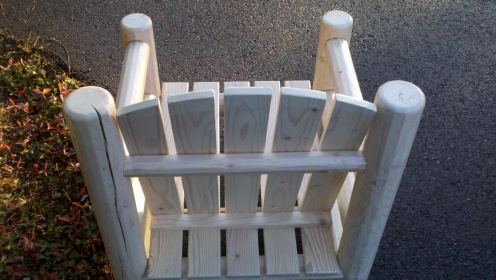
Wow man this sure looks great! How long did it take you? I have a lot of great ideas on what I could use this for.
My wife hasn’t stopped talking about this since I showed her this post! Thanks for the detailed instructions!
These instructions are really good! Thanks for posting such great ideas!
I want to pickle a pine floor that I’m sure has had polyurathane on it. Is it still doable? Can I prime it with a clear primer like XIM or Kilz?
I would think it is still doable. There are a couple ways to try. The best way would be by removing the polyurethane coat using a floor sander. Plan on spending $100+ worth of sandpaper since the poly goobs up the sandpaper. I prefer oscillating sanders over belts because it’s too easy to gouge the floor with the belt sander. Most tool rental stores should carry both. Once you have stripped off the poly coat you could start the pickling process.
The other option is to try what you said and use a primer. It just might work, though probably would not look quite as good, however would be faster and less cost. I would recommend you first experiment on a scrap board to see how the poly takes a primer coat. You might find it works with no issues…and you might find that you need to scratch the poly coat so that the primer has recesses in which it can cling to. Just make sure the paint really sets up well since a floor will take a lot of abuse, and you wouldn’t want the paint to peel off.
Once the floor is pickled, you will want to protect the finish by applying a couple coats of Kelthane / polyurethane. Kelthane is my favorite.
Regardless of the approach, one of the more challenging issues is making sure you keep a consistent application throughout the entire floor, especially if you have a large surface. May be best to have a few extra people helping so that you can cover larger areas before the paint dries.
Best of luck. I’d like to know how it goes. I’ve never seen a pickled floor, but now you have me intrigued.
Want to get started with this but some of the stuff is already painted and I really don’t want to strip it…is there a way around this? thanks, Lorraine
If the wood has paint on it, then pickling probably won’t work until the wood is stripped. The reason is because you need to be able to see the grain in order for the pickling to take affect and look right. On the other hand, varnish or stain might be fine…but like I said earlier, best to test first.
Thank you – great instructions. If I use an oil-based paint, do I still add water or do I substitute the paint thinner for the water?
Use thinner for oil-based paint. All the other steps remain the same. Only thing I would add is make sure you have plenty of ventilation for the fumes. Other than that, oil paint should give you just as good (or even better) results.
doing a table. didn’t know what pickling was great how to!
Yes, you can pickle a table. And they look great with that finish.
Same principles apply: clean wood of all previous paint, dirt, etc., then start the pickling process. A seal coat is a must. If you are going to eat off of the table make sure whatever seal coat you use has been approved for that purpose.
Send me a pic when you’re done. I’d love to see how it turns out.
I once was in a new house and they had just pickled the kitchen wood. There was purple and green showing through places all about. What was that and is that pickling? They were off white and so beautiful, they called it pickling. How did they get the color in there? Thank you and any help would be appreciated.
Sounds stunning. Without seeing what you are talking about, I can’t say for sure. However, it definitely could be.
Technically, you can use several different coats of color. Some colors will compliment each other well and others may contrast. There are a bunch of combinations you could do.
In order to pickle your project so that various colors are showing through, you first need to apply the base coat(s) of color. The first coat is the thickest, with each subsequent layer a little thinner. (If you’re using oil based paint, then add paint thinner to “thin” each layer; water based paint can be thinned with water.) Just be sure you don’t mix up paint types for each layer…in other words, don’t use oil for one layer and water for the other.
Once the paint has dried, lightly sand accent parts of your project. By sanding through the layers, new color will show. Experiment with how big of areas you sand and how deep you sand, even sanding all the way to the wood in some places. It adds a lot of visual interest by varying the colors that show through.
On a side note, this is also a great way to “antique” a project. Some pros do this.
Lars Benson
Thank you so much for the information and I will try it as per your instructions also I will send you a picture when I get it completed.
I have a project of whitewashing a dark stained and varnished plywood cabinets and counter top. Is this process going to work?
The short answer is: Yes, it should work. Remove as much varnish as you can by sanding and then follow the pickling technique mentioned above. Varnish is usually pretty simple to sand off.
The dark stain may look quite stunning under the pickling. However, the contrast may be too stark. If it were me, I would start by doing a small test run…if you don’t like it, sand off the pickling. If it looks cool, then you just saved yourself a lot of work.
The biggest challenge will be if you want to remove the stain. The stain penetrates the wood and will require a painful amount of sanding to remove.
All the best.
Lars Benson
Would this be the same process for making a “drift wood” type stain?
Generally speaking, yes. Some people use the two terms, driftwood and pickling, simultaneously. But there is a slight difference, at least how I’ve always referred to them. Understanding the difference helps you figure out how to approach either technique. The main difference is that driftwood technique allows for more wood to show through, with a subtle patina over top. In other words, pickling is more profound than driftwood.
Done right, the stain does not draw attention to itself but rather compliments the entire piece of wood. Contrast with pickling, where the stain is a main feature.
To get the driftwood affect, I would just use less paint and more water/thinner. Wipe away most of your solution after each coat. You’re better off diluting the stain, and building up to the effect you want than trying to get the right dilution the first time. Plan on applying 3-5 coats to build up to the desired result.
Experiment with colors such as grays, blues, browns, and even greens…but be careful with these colors or you will quickly overdo it. The color will give a weathered, or “driftwood” look to your project. I would probably add the color straight to my base coat rather than as an accent. My first choice would be grays and blues.
Another idea is that you could mix two separate solutions, one with that is slightly gray and blue and one that has another color such as brown or green (again, be stingy on the amount of color). Use the gray/blue solution for your first couple of coats, then once dry, apply your second solution. It’s a layering technique that can add depth to your project. You won’t find many “store bought” pieces of furniture that go to this level of work, but then again most commercial finishes look flat and unsophisticated. And it’s not that hard to do.
Like always, test your stain on some similar scrap wood before applying to your project.
All the best, Lars Benson
THanks for the great website. One request, could you add a print friendly tab?
thanks again
kathy
Sure…any suggestions on how to add it in WordPress?
This is my first time using a paint brush..so you akready know that this will be an interesting project. I did a little research before discovering your very informative comprehensive site. I have already ordered the “pickling stain” from Miniwax. I would like the table to have a more driftwod finish as you described can I accomplish this and one more question although I have many..does the stain have to be completely removed
Thanks
Lyn,
Sometimes the best way to learn a technique is by jumping in with “both feet” and giving it a try. Your Can-Do attitude is inspiring, especially if this is your first project.
Tables are great candidates for trying pickling and driftwood techniques. In fact, one of my favorite tables had a driftwood finish; it had a stately colonial feel to it. Simple yet elegant. A rare mix.
The main consideration on whether to apply such a finish to any project is the design/style of your project. While you can pickle nearly any project, some lend themselves more to the finish than others. In my humble opinion, the style of your project should complement the finish. Neither should stand out above the other. In other words, pickling a retro table would feel off because the modern feel of the style contradicts the antique feel of the finish.
Another question to ask: Is your table made out of real wood? If not, then you may struggle with any finish. If it is a wood veneer, you’ll need to be extra careful that you don’t sand through the paper-thin veneer. My personal preference is to build and buy solid wood furniture whenever possible and practical since you have more finish options. But that’s not always an option.
A seal coat is a must. If you are going to eat off of the table make sure whatever seal coat you use has been approved for that purpose.
As for your question on whether or not to remove the stain, I assume you are meaning that the table already has a stain on it? If it is a dark stain then I would probably want to remove it first. Removing stain can be time-consuming and frustrating though, so be sure you are committed to seeing it through before starting. If you’re not sure, give it a test to see how the pickling looks on top of the stain. You might find it looks good.
Best of luck with your project.
Lars Benson
Can Someone tell me if I can do this on my stairs? What colour will I have to use? And more important what varnish so It doesn’t come off when walking on the stairs?
Yes, it can be done on stairs. If you ever look through a Pottery Barn magazine you can sometimes see examples.
As for colors, pick those that best match the decor and style of your home. I would lean toward the lighter colors. As for varnish, I would recommend several coats of kel-thane. Regardless of what varnish you pick, you will eventually need to re-varnish the tread due to the heavy abuse stairs take.
All the best,
Lars Benson
Thanks for the great tutorial! I have an old dresser that has a lot of details and curves to it – I am wondering: if I were to pickle it, would I need to sand it all the way down to the wood (or, in other words, remove the varnish/sealer that’s on it right now?)
You will have the best results if you remove as much of the old varnish as you can. However, it may not be practical or even possible to remove it all, in which case I would suggest using a thicker base. The more viscous, the more it will “stick”, especially in those hard-to-clean areas.
Just be careful that you wipe away the excess in the other areas, or you will lose the pickle effect and just have a white dresser.
Cheers,
Lars Benson
is pickling the same as ceruse? I saw a Remodeling show where they ceruse the crown moulding and i thought it looked great. Can you help me get started on what kind of stains to buy?
Thanks,
Edward
Edward,
While they have some similarities ceruse is actually different. In my opinion, it is a beautiful finish…if not overdone. It looks best when there isn’t too stark of a contrast between the grain and wood. Subtle = stunning.
As for the second part of your question, you can make your own wash. Follow the steps in my pickling article, but make the stain a little thicker. The idea is to scuff the grain enough that it soaks in the wash so that when you wipe away the excess, the wash remains in the grain and not the rest of the wood.
I also recommend doing a couple test runs first. Each species of wood, including how the wood was cut, affects how the wood accepts the finish.
Cheers,
Lars Benson
I have a teak veneer dining room table (yes I had had since new) and wonder if it is possible to pickle this
Linda,
If it is a relatively new table, then my guess would be No. It all has to do with how they are made. It depends on how thick your veneer is and what kind of finish the table already has. The problem with many veneers is that they are about as thin as paper, and so you can easily sand through them while trying to prep the wood. Combine a thin veneer with a factory finish, and it could spell disaster. On the other hand, if the table has a light/soft finish with a hearty veneer, then yes, it should be possible.
My mahogany veneer table would not be possible to whitewash. If the finish wasn’t rock-hard, I suspect my butter knife and fork could cut through it!
Best,
Lars Benson
Our existing banister is redish wood. It has no stain on it, just a light varnish. I am really interested in pickling it grey, but I am worried about the red wood (tannin?) color being prominent after the pickling stage.
My husband wondered if a straight stain instead of pickling would cover the red more. what process would work better on red wood?
Do you need to varnish stain afterwards?
Thanks very much. I just found your sight and it is so informative!
Thanks
Karri-Ann
Karri-Ann,
Glad you like the site. As for your question, I’m not really sure how dark or prominent the red is. A general rule is the darker the wood, the more difficult to apply stain (unless you are going darker). You probably couldn’t do a true pickling without red (or worse, pink!) bleeding through.
But you could do a work around.
Use either a light-colored paint or a strong light-colored stain. You may need to apply more than one coat to keep the red from bleeding. Once you are satisfied with the base color, apply a thinner coat of paint on top. The thinner coat becomes the accent.
Again, not a true pickling affect. But it could turn out pretty neat with a vintage feel.
Best of luck,
Lars Benson
Great instructions! I have a den that is tongue and groove dark juniper paneling. The room is so dark and would like to lighten it without completely covering up the nice wood. Would this technique work well on this type of wood paneling? Also the wood is very rough, it appears to have never been sanded or have any type of finish on it. I know I will have to sand it first. Thanks so much!
Hi Hannah,
It should work, but you may need to apply more stain than you would with a lighter wood.
Cheers,
Lars Benson
Thanks so much, Lars. I will let you know how it works out.
Hannah
Thanks so much for considering those of us out here who need detailed instructions. I’m about to pickle my oak cabinets in my kitchen and am so excited about it! My biggest hurdle is sanding down the old varnish to get to the raw wood. I read in another site that pickling is best for oak wood and whitewashing is best when used on pine. This made me very happy since the whitewashing technique apparently is more labor intensive. This sounds so easy, I’m eager to get started! Thanks again for your valuable information!
[…] A No-Hassle Technique to Pickle Wood « WoodplayJan 2, 2009 … Woodplay …. Thanks for the detailed instructions! …. and I will try it as per your instructions also I will send you a picture when I get it completed. […]
Woodplay instructions | Pydltda said this on April 2, 2012 at 2:27 am |
Sounds good. I look forward to seeing the picture. Best, Lars.
I enjoyed your step by step instructions and would like to try this in my kitchen. I have sevrral questions. First, could I use a touch of yellow in my white paint? Second, do you whipe or brush on the stain? Third, do you have any pictures of your finished kitchen that you could display? Tx for all of your help!
Hi Robyn,
I’m glad you enjoyed the instructions. Yes, you can use yellow with white paint and I’m glad you used the key words “touch of.” Yellow can be a tricky color to use because of how lighting affects it. One wall in the same room painted with the same paint can appear to have a different color simply because of how shadows and lighting affect it. You can easily overdo yellow and not even know it until you have a bright sunny day. Just start with a touch of yellow and then build up to your desired color. Another tip is to work in a smudge of brown to help soften the yellow. It all depends on your desired outcome. Just run a few tests before you commit to the whole project!
I typically use foam brushes to wipe on the stain. They are cheap and don’t streak the paint. Cotton rags work great to wipe off the excess stain.
Unfortunately, I do not have any pictures of my kitchen. We moved to a new house and we haven’t decided what style we want our kitchen to be yet. I did, however, stay in a log cabin last winter. It was pretty cool because the owners had pickled all of the logs and furniture. It was pretty neat. I did take pictures of it and will need to post those.
All the best,
Lars Benson
Is pickling suitable for outdoor wooden porch floor and what based paint should I use
Hi Cindy,
Yes, pickling is suitable for an outdoor wood floor as long as you use the right paint and finish. Just be sure to buy exterior grade. I prefer oil-based for outdoor applications. Then make sure you seal it with an exterior finish.
As with any floor, it will wear more than furniture or cabinets. So I would apply more than one coat of finish for added strength.
Regards,
Lars Benson
I hope you would not mind if I posted a part of this site on my univeristy blog?
Yes, that is fine. Just link it back to my site.
Cheers,
Lars Benson
Great info. If you are pickling a pine board celing do you need to finish coat with polyurethane?
Hi Don – No, you don’t. However, it could help make dusting easier.
Best,
Lars Benson
Lars- If we just purchased a lake home with pickled wood ceilings and walls in the bedroom and dining room that are faded, is there anyway to renew the finish? You can see the wood was much darker where pictures were hanging. It also appears that it has not had any kind of finish on it so feels rough. Would a satin finish water based varnish be best? If there is no finish, could it also be painted if we wanted to change the look to make it more formal? Thanks!!! Wanda
Hi Wanda,
Wow, that’s a tough one. Without seeing it myself I can’t be sure. But here’s my guess. Your best bet is to redo the ceilings and walls rather than try to “patch” the darker areas. It would be near impossible to match. The rough feel could be a result of a several different things – wood that wasn’t sanded smooth, dust that stuck to the finish before it dried, a distortion/blemish of the finish, etc.
I personally like water based finish (polyurethane, kelthane, etc.) for indoor applications since it isn’t as fumey. Try to pick up a product that protects against UV and that should help extend the life of your walls without as much darker areas from pictures.
In answer to your last question, yes, it could be painted regardless if there is a finish or not. Just be sure to use a high-quality base paint and then be prepared to apply more than one coat of top paint in the event there is bleed-through.
All the best,
Lars Benson
Enjoyed this article. Am considering a pickled effect for 50+ yr old mahoganey (real) paneling. Original stain (orangish brown) is quite faded and paneling appears dry and porous. We have not oiled or waxed it since purchasing the home in 2004, but it is possible previous owners have. On the other hand, it could be an old varnish finish. How would I tell? Do you think I can wash it thoroughly with TSP and then use the primer technique to get a pickled effect?This is a 30+foot lvg rm wall and I would like to avoid mess of sanding. Also, there are no hidden areas to “experiment” on. Altho’ there are some folding closet doors that I could play with and replace if the experiment doesn’t work.
Good afternoon Norma,
My grandmother had mahogany paneling in her home, so your note brought back some memories. (On a side topic, I even have a couple of those panels I’ve been saving for the right woodworking project.) Based on the age of your paneling, the wood is likely “real” so you have more options than wood with a paper-thin veneer or even a stamp.
Without just seeing a film, I’m not sure the best way to check for wax…If it were me, I’d start by using hot water and an all-purpose cleaner such as TSP or ammoniated detergent to see if anything comes off. Worse case is you’ll have cleaner walls. You can also buy sanders that have hoses and dust collectors on them. They won’t capture 100% of the dust but you’ll have the best results by sanding the wood first.
As for hidden areas, if you have trim on the wall (baseboard?) you could experiment on the wood behind on the trim. Just a thought.
One last thought. Pickling a dominant dark wall will be a huge difference to the look and feel of your home. Be sure that’s what you want before trying. While you don’t have any test areas, I’d recommend just making an “all or nothing” decision either way and then go for it. If it doesn’t turn out as well as you would like, be prepared to either try again and/or replace the panels out entirely.
Best of luck,
Lars Benson
[…] A No-Hassle Technique To Pickle Wood « WoodplayThis next step is not science. I had about a quart of paint leftover in a gallon can. solution for your first couple of coats, then once dry, apply your second solution. It’s a layering technique that can add depth to your project. You the design/style of your project. While you can … Get Document […]
Science Project You Can Paint Couple said this on September 13, 2012 at 7:23 pm |
Help, my 84 year old dad just garbage picked a oak kitchen table for me. It is far darker then my cabinets and I hate it. Don’t have the heart to tell the old guy this as he is proud of his “find” How do I prep the table to pickle it?
Lisa,
Let’s hope the table is a diamond in the ruff. Start with a good all-purpose cleaner such as TSP and see if you can clean out the grime first. Then use a sander and remove the rest. You may even need to use some chemicals if the table has groves, trim, or other details. Once the oak is a light brown color it’s ready for pickling. Be prepared to spend several hours on prep work – it’s the hardest part.
Lars
Thanks for your instructions…I have sanded my table top down and trying to decide if I want to use a color other than white to do the pickling.
Faye,
You’re welcome. If you have a scrap peice of lumber lying around you could pickle it first using the colors you want. Once dried, lay it on top of the table to see if the colors works. You might find a great combo.
Lars
I want to do a black wash on myOak kitchen and bathroom cabinets? where some of the woodgrain shows through. Any suggestions? Also do you know how to tell if a piece has poly or varnish on it?
Good question. The best way to tell the difference between poly or varnish is to use solvents. It’s usually not necessary to know. Polyurethane is basically varnish.
I’m thinking about whitewashing my maple kitchen cabinets then staining with a grey stain. (Just put in new black floors so thought this would look good with them). I have a lot of cabinets. I’m testing now on some crown molding that I sanded and just got done pickling. Went to find out where to get the Kel/thane II coating before staining and found out that we don’t have any Kelly Moore paint stores in Spokane, WA 99223. What other brands of finish would you recommend? I probably would like more of a satin finish. Also my craft store doesn’t have the gel stain and it probably wouldn’t come in gray anyway. Minwax has stains but you can’t get any samples, but have to buy a whole quart for the color. Any other suggestions for getting some stain samples or small containers to try out?
Hi Linda,
The project sounds very promising. You can go with any X-thane type material. You should be able to find polyurethane at most stores, including Walmart. Minwax sells half pints of stain, which would be a lot less than a quart. A little goes a long ways. Try Home Depot, Ace, True Value, or one of those type stores. If they don’t have samples then you can buy the smaller quantity/size.
If you are choosing a water based solution, you could even get away with using acrylic paint. You should be able to find it just about anywhere. If you are using oil, then you could buy a tube of oil paint used by artists.
Good luck!
Lars
We have cheap prefab cabinets in our new house and I would like to whitewash them. They are an oak color. They have a light coating of polyurethane. How do I approach this project?
Thanks,
Melissa
Hi Melissa,
A challenge you may have is the veneer. It may be so thin that it is nearly impossible to whitewash. You don’t need much wood veneer, but keep an eye on it.
Start by stripping the polyurethane finish. Use a sander sparingly since it’s easy to sand through the veneer. Once the cabinets are free of old finish, follow the steps in my article and it should turn out great.
Best of luck,
Lars
I am so happy that you are still answering questions more than four years after your initial post! I am considering pickling or white washing new pine wood for a ceiling in an addition. I like that your process seems fairly simple. I am confused though about why you put the stain on after the varnish. Can the stain penetrate the varnish? And are you covering the entire area with the stain or just the places where the wood is really exposed? Thanks in advance for your help!
Hi Cathy,
Thanks for the post. Step 7 would typically happen before you apply varnish, and that’s normally how I would do it. Depending on the gel stain you use it could smear when you apply the varnish, which could be the only reason to wait till the end. I encourage everyone to run a test first before hitting your main project. Better to find out something doesn’t work like you envisioned on a scrap piece of wood than your ceiling.
As for your second question, the gel stain is used for accents that add depth and visual interest to the project. It’s optional. I liked using it for my project because it produced more of a rustic/antique feel, which was what I was after. If you applied it everywhere then it would cast your pickling in an off-white color and basically make the ceiling look a pale brown.
Hope that helps.
Lars Benson
I’m one who just found you and have avidly read! I have a solid mahogany front door w/ sidelights. I just used Citristrip to remove 11 coats of Olympic dark brown stain (that I didn’t know I should have wiped off) and 11 coats of wipe on poly. Following their instructions was magic, and it did rasie the grain as they’d indicated.
The wood is now a gorgeous grayed wood, with the residual dark stain still in the crevices and grain. I want to keep this gray, and was wondering if I should put a sealer on it at this layer? I was planning on using some gray stain I have for subsequent color, finally sealing with a clear, dark paint base.
Would you suggest I seal it as is, sand to smooth the grain then gray stain? THEN, the final sealer coat?
Thank you. I love how it’s looking — after 10 years — and don’t want to screw it up!
Christine,
Sounds like quite the project! Before you do anything, be sure to first wash the door with a damp rag. You need to make sure that the gray color isn’t leftover finish or stripping material.
In answer to your question it all comes down to the effect you are after. If you want the door to be all gray, then wait to apply sealer until you remove all of the residual stain from the wood. Sand down the grains so that you have a smooth, easy to work with surface. Only after you are satisfied with the color should you apply the sealer.
If you are after the specific gray that’s currently on the door, and don’t mind the layer of dark stain in the crevices then I would seal it to “lock” in the color.
Do you have a toe kick or other hardware on the bottom you could remove to test? Always a good idea, especially when working with an important project like this.
As a sidenote…Since it’s an exterior door you will need to apply the right amount and type of sealer to avoid damage from the weather and sun. Most professional door companies use several coats of sealer to protect the door. Also, that stuff can streak/drip very easily so best if you can use a sprayer.
Send a pic when you’re all done. I’d love to see how it turns out.
Lars
Lars, thanks for that response, which I completely missed. I’ve since finished my mahogany front door and sidelites. It turned out beautifully, with some of the stain still in the grain. I did sand it smooth, because all the wetness of the Citristrip and washing that off with water definitely raised the grain.
After much reading, I let it dry for a couple weeks and sealed it with an exterior latex paint base 5. It’s got all the UV protection of paint, etc., just without the tint. It won’t yellow, either, which I abhor. After all that work? I’d kill myself.
I’ve also since stripped 10 kitchen cabinets (in place), white washing them with almost your instructions. Rather than white, I used gray, sanding in between subsequent layers of Minwax Provincal and Jacobean. Spattering with ebony. I am so thrilled with this I can’t stand myself. I really appreciate your instructions because as easy as you made it sound gave me the courage to just go for it.
Thank you, sincerely.
Christine
Excellent. Thank you for the information, especially the “recipe”. I didn’t realize that pickling included white paint, I thought it was a type of bleaching solution.
I have a question – I have a Cape Cod style home in Maine, built in the ’80s…. therefore all of the wood trim, interior doors, etc.. is select pine with a honey stain. I’d really like to consider pickling the woodwork &doors to tone down the orange-yellow jaundice coloring. Is it possible to do pickling with the window trim in place? I’d tape off the wall areas around the trim & plan to sand off the existing stain. I’d love to learn your thoughts on the effectiveness of doing the pickling “in-place.” Thank you!
Brooke
Brooke,
Thanks for the note. To answer your question, yes, you can pickle the wood while in place. In fact it would be my first choice too. Just do what you said, and tape it off so that you don’t ruin your walls while at it.
Lars
I pickeled a mantel for a client. However the sanding I did on the old finish did not seem to work. After pickling, a stain started coming through. What can I do to make this work without stripping all the pickling off?
Tish, It’s always best to strip the finish down to the wood whenever possible. Some stains, especially if oil based, will continue to bleed through even after 10 coats. I know there is paint that blocks stain penetration but I haven’t heard if there are any other products, such as a sealer or varnish, that will also block it. Give your local paint store a call — the true paint store that is, and not your Do-It type center, to speak to a paint expert. If there isn’t a product, then you probably need to strip it off and start over. 😦
I’m making over my nursery glider as a gift for my sister who has a baby on the way. I really want to give it a gray washed, reclaimed barn wood look, but the more I research exactly how to give it that look, the more confused I become. It seems that the terms pickling, white washing, and similar techniques are used interchangeably, and the actual techniques have all been different. The glider is oak, I believe. Would the process/technique you describe here with a gray paint give me the desired look I’m that I wanting?
Hi Julie,
You are right, the terms are often used interchangeably. If you use the techniques I describe then you should get the results you are after. Just substitute gray for white.
An additional thought or two. Barn wood is rarely just one color. If you examine it closely you will see that there are actually several colors that blend together to make the final outcome. Consider all the textures and lichens and it suddenly is a lot more complex. Gray may be the dominant color, but if you are after a more realistic result then use other colors for accents/highlights. Those colors could be anything from browns, to blacks, to tans, to crimsons, to blues, or even to greens. Just be stingy when it comes to accents as they can be overdone.
Best of luck,
Lars Benson
We are adding a bathroom and have cherry wood in various widths. My husband wants to use it as wainscoting but would like it whitewashed but I think the pickling would be a little more subtle. Is the cherry suitable for pickling?
Hi Mary,
Short answer is Yes, cherry will accept pickling. You may need to apply a thicker solution since cherry sometimes is a darker wood (depending on age and finish). Test on a scrap piece first to get the right consistency.
With that said, cherry is a premium hardwood and sells for a premium price. Pickling covers up the beautiful grains and colors, at least to some degree. If you are okay with that, then go ahead. Otherwise, you could get away with a cheaper wood such as pine or popular. Best wishes on your new bathroom!
Merry Christmas,
Lars
Terrific post but I was wanting to know if you could write a litte more on this
topic? I’d be very thankful if you could elaborate a little bit further.
Bless you!
Anything in particular you are wanting to know?
I have a ‘cherry’ wood vanity but the sides are some kind of thin plastic veneer. I want to refinish it in a cottage style off white with sort of a rubbed or pickled effect. I know I can do the wood face but will the cheap sides take it?
Hi Mary. Unfortunately, I don’t think the sides would take it well. But as long as they are not too visible you can always try. It will look different than wood. Best of luck!
Lars Benson